> ## Documentation Index
> Fetch the complete documentation index at: https://docs.phishy.io/llms.txt
> Use this file to discover all available pages before exploring further.
# Configuration
## XML ADD-IN Configuration
### Activating Delete Feature
##### Register an APP in Azure AD
* Microsoft Entra ID -> App Registrations || search for App Registrations
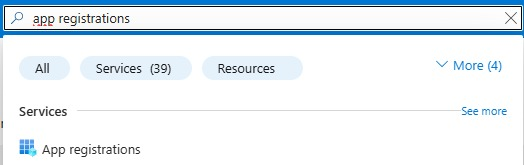 * Create an New Registration in App Registrations
* Fill out the Register Options As Below and Create
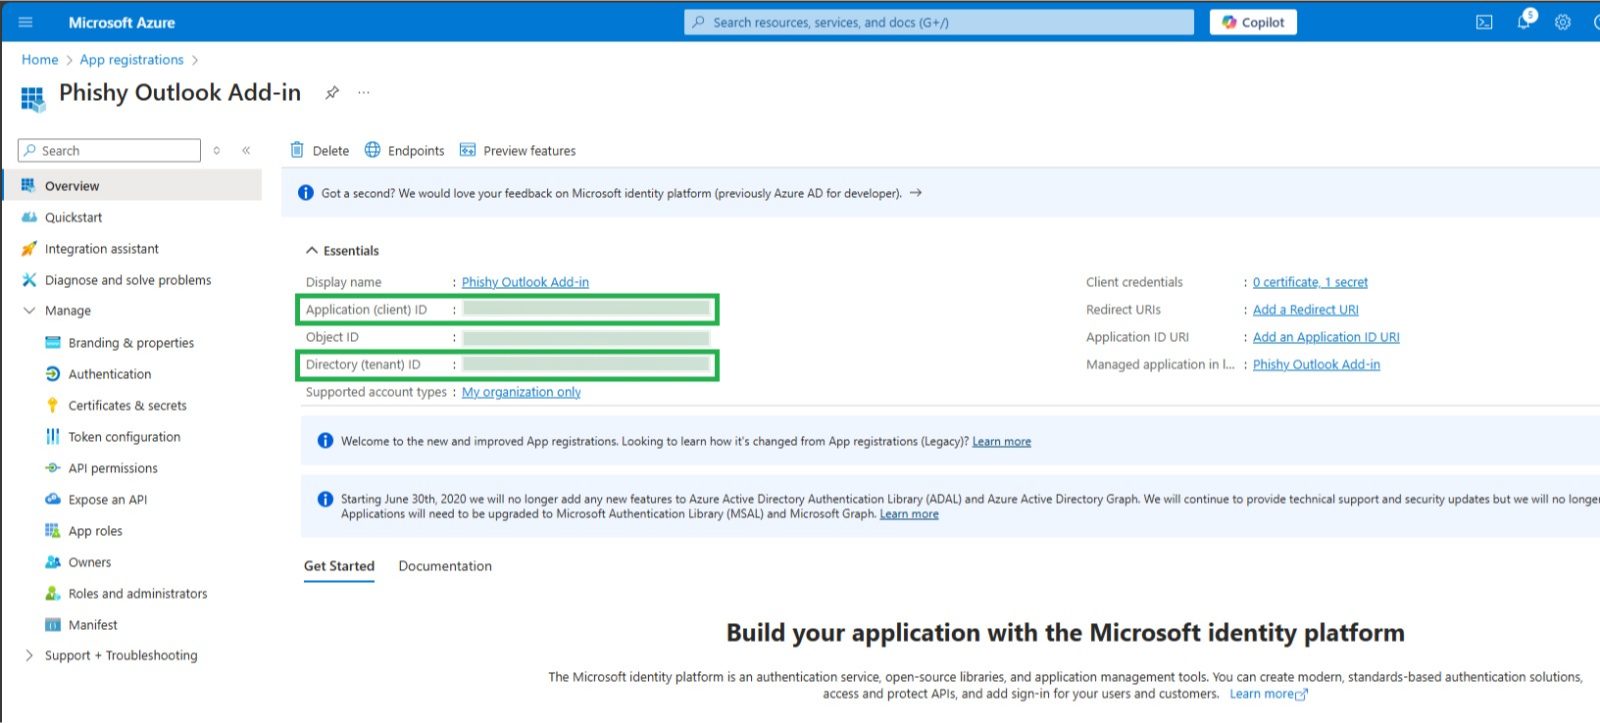
* In Overview You will need
* Application (client) Id
* Directory (tenant) Id
* Create an New Registration in App Registrations
* Fill out the Register Options As Below and Create
* In Overview You will need
* Application (client) Id
* Directory (tenant) Id
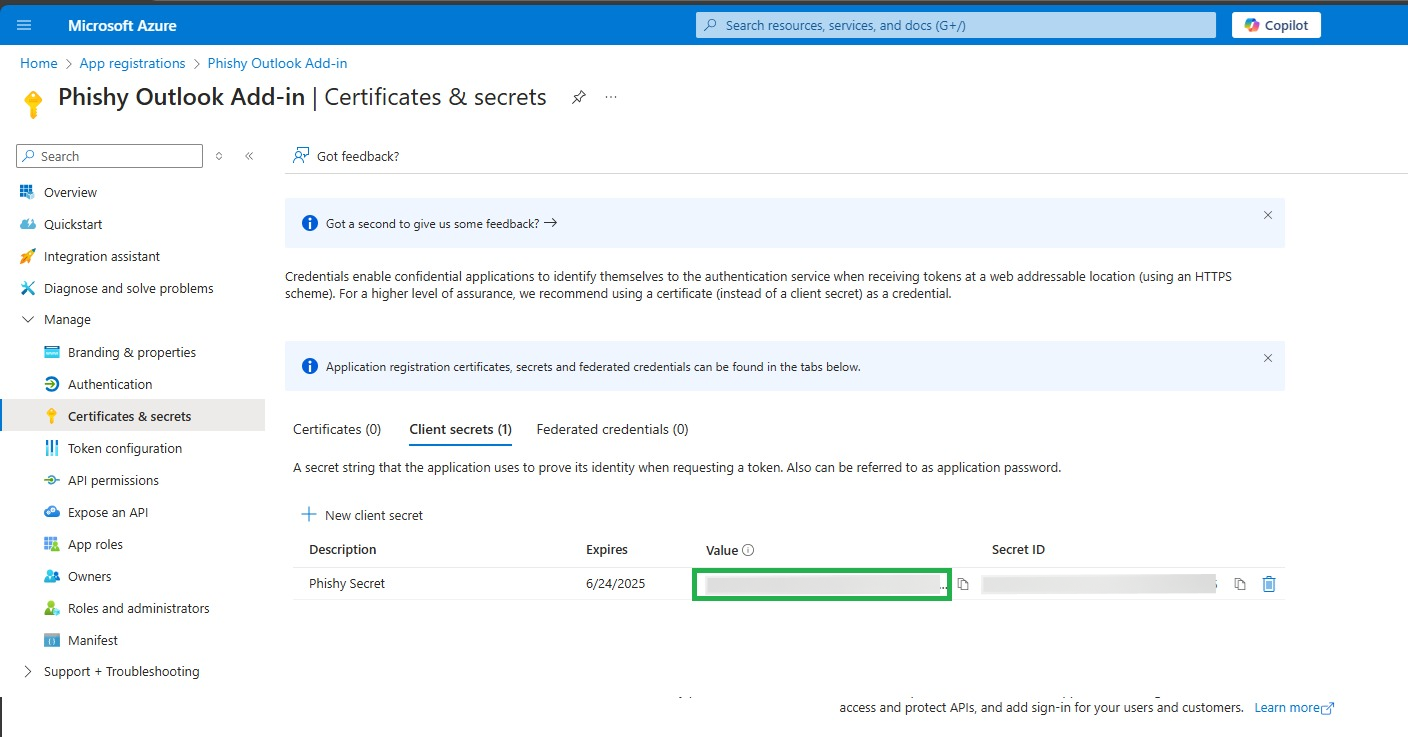
 In Certificates & Secrets tab, Create a new client secret. Value will be shown only the first time you create it so we advise you to write down the value because you will need this.
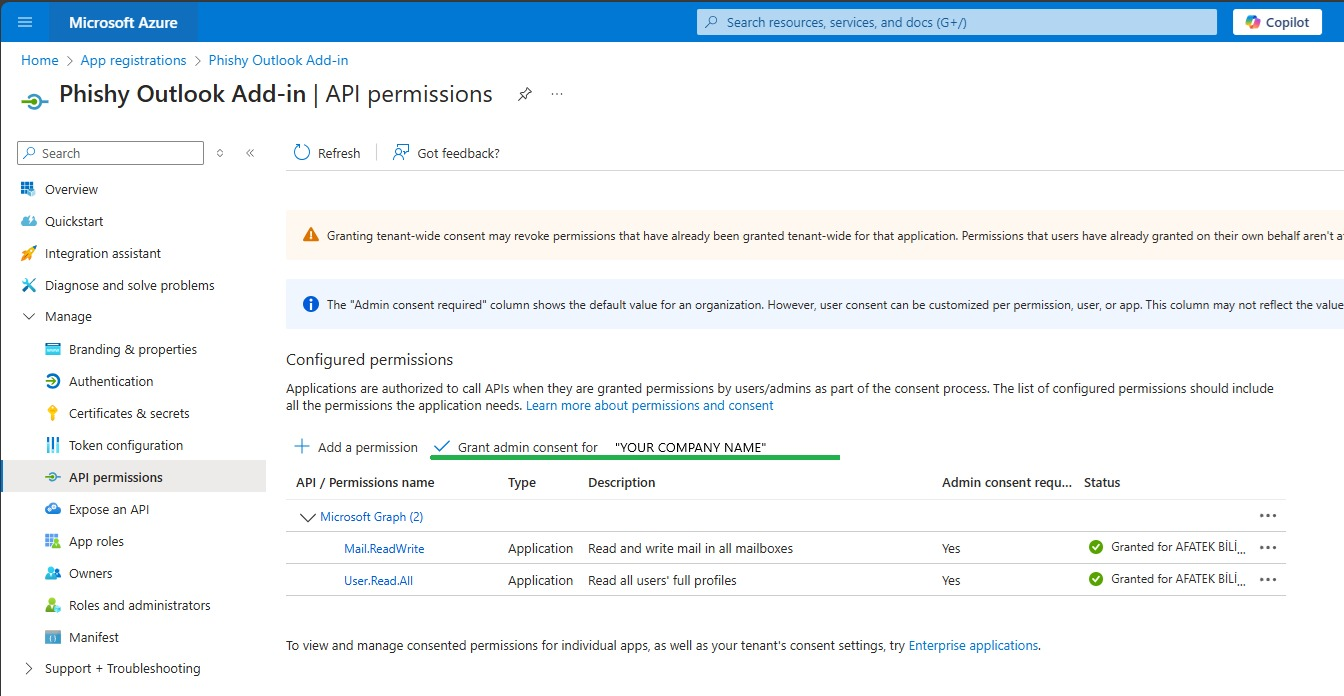
 * Lastly In API Permissions tab, Add a permission and chose
* Microsoft Graph -> Application Permission
* User.Read.All
* Mail.ReadWrite
* Click Add Permissions
* Click ✓ Grant admin consent for “Your Company”
* After all these steps it should look like the image below
* Lastly In API Permissions tab, Add a permission and chose
* Microsoft Graph -> Application Permission
* User.Read.All
* Mail.ReadWrite
* Click Add Permissions
* Click ✓ Grant admin consent for “Your Company”
* After all these steps it should look like the image below
 ### Enable Deleting In Phishy UI
* In Phishy UI Go To: Incident Response -> Settings
### Enable Deleting In Phishy UI
* In Phishy UI Go To: Incident Response -> Settings
 * Under Addin Preferences (XML) see Cloud Accessible Status
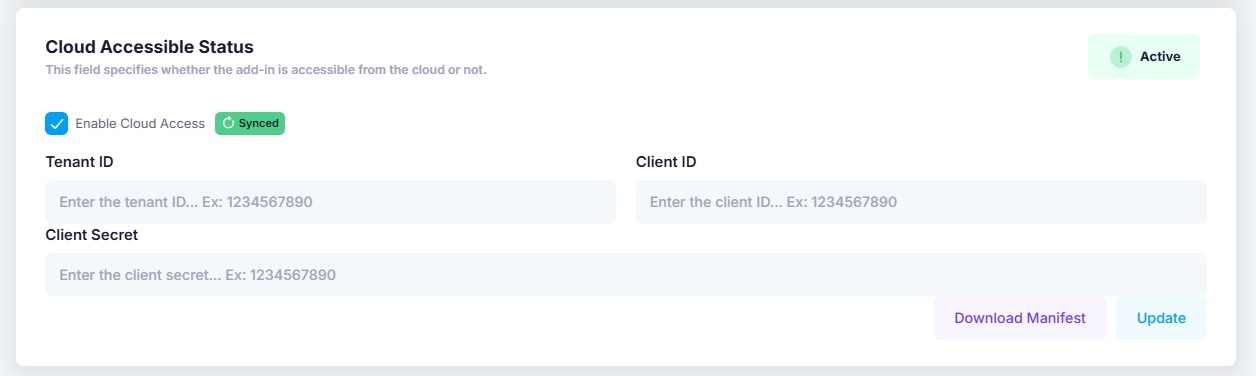 * Enter your Application (client) ID In Client ID section
* Enter your Directory (tenant) ID InTenant ID section
* Enter your Secret Value In Client Secret section
* Finally Click
* Enter your Application (client) ID In Client ID section
* Enter your Directory (tenant) ID InTenant ID section
* Enter your Secret Value In Client Secret section
* Finally Click  button to Enable Email Deleting Feature